Pvc Ceiling Panels Installation Guide

How To Install Plastic Panels On The Ceiling Easy Installation Pvc Ceiling Panel Youtube

How To Install Metallic Ceiling Tiles Metal Ceiling Pvc Ceiling Tiles Metal Ceiling Tiles

How To Install A Tin Tile Ceiling Tin Ceiling Tiles Plastic Ceiling Tiles Ceiling Tiles

D215 Pvc Ceiling Tile 24x24 Drop In Pvc Ceiling Tiles Ceiling Design Bedroom Pvc Ceiling

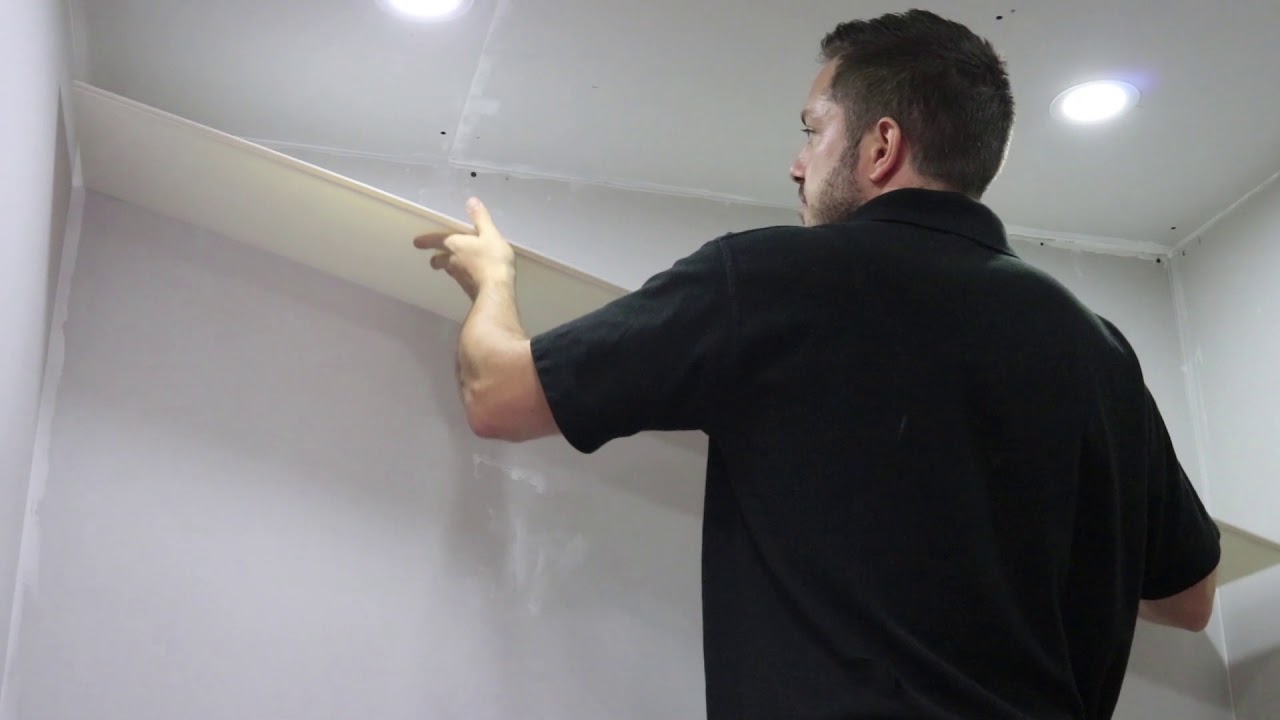
Pvc Ceiling Panels Cladding Installation Youtube

A Coffered Ceiling Guide Plastic Ceiling Tiles Pvc Ceiling Design Pvc Ceiling Tiles

Tuftex panels are the best building panels available for many home improvement projects such as deck covers sun porches carports patio covers privacy panels as well as many light commercial and agriculturalapplications.
Pvc ceiling panels installation guide. Pvc ceiling panels can be fitted onto steel brandering or wooden battens 38mm x 38mm using a drywall screw timber course thread steel fine thread. Installer can use tile back support as needed to prevent sag. Pvc ceiling panels fitting instructions. 3 pre drill tuftex panels 4 fasten panels in place 5.
There are multiple ways to fit this tricky last length including using adhesive and cutting the ceiling panels. A copy of these instructions is enclosed with every pack of panels but you can also download a pdf version of the sheet by clicking on any section of the details below. For a quick and stress free procedure follow the instructions supplied to install your pvc ceiling panels. Originally the manufacturer only produced glue up only pvc ceiling tiles and they were not made for grid installation and will sag some.
Continue this until the entire ceiling is covered sans the last length. Make sure area is well ventilated during installation and for some time after. The panels must lay in the same direction as the main trusses. Before installation ensure that the same shade and batch is used in one area.
General pvc ceiling panels are unaffected by water or moisture. Simply push the new pvc ceiling panel into the groove. The property owner can install pvc ceiling tiles by gluing to smooth clean surface with overlapping edges. The screw must not break through the pvc panel.
Wall and ceiling panels installation instructions these installation instructions apply to our internal cladding panels both for walls and ceilings. Screw your pvc ceiling panel onto the brandering. Measure the gap mark its width on the panel then carefully saw to the appropriate size. Sit back relax and enjoy installation tips.

Pvc Ceiling Panels How To Install Aquaclad Ceiling Panels By Ipsl Youtube

Plafon Pvc Model Drop Mainan Ceiling Design Bedroom Pvc Ceiling Design Ceiling Design Living Room

Drop Ceiling Installation From Armstrong Dropped Ceiling Armstrong Ceiling Coffered Ceiling

Pvc Ceiling Panel Installation Youtube

Nail Up Ceiling Thermal Insulation Installation Guide Installing Insulation Ceiling Thermal Insulation
How To Install Bathroom Ceiling Cladding Youtube

Different Types Of Ceilings Ceilings Armstrong Residential In 2020 Ceiling Design Modern Pvc Ceiling Design Ceiling Design

Pvc Ceiling Tiles Look Like Real Tin But Much Less Expensive Plastic Ceiling Tin Ceiling Tiles Ceiling Tiles

What Are The Advantages Of Pvc Panels Reasons For Pvc Wall Or Ceiling Cladding Home Decors Ideas 2020 Pvc Wall Pvc Panels Ceiling Cladding

How To Install Pvc Panels On The Ceiling Easy Installation Pvc Ceiling Panel Youtube

Decorative Ceiling Panels Pvc Ceilings Cladding Ceilings Pvc Ceiling Cladding Pvc Ceiling Panels Plastic Ceiling Panels

Pvc Beadboard Planks On The Ceiling Beadboardceiling Highceilinglighting Ceiling In 2020 With Images Pvc Ceiling Design Neutral Bathroom Decor Pvc Beadboard
Td25 Faux Tin Ceiling Tile Ceiling Tiles Talissa Decor Ceiling Tiles Faux Tin Ceiling Pvc Ceiling Tiles

Wpcceiling Pvcceilingtiles Homeceilingtiles Www Woodhengsu Com Pvc Ceiling Panels Composite Decking Pvc Ceiling

Pvc Ceiling Panels Installation India Youtube In 2020 Pvc Ceiling Pvc Ceiling Panels Pvc Ceiling Design

Hot Item Building Material Pvc Ceiling Panels Waterproof 3d Wall Panel For Decorative In 2020 Ceiling Panels 3d Wall Panels Pvc Ceiling Panels

How To Install Styrofoam Faux Tin Ceiling Tiles Faux Tin Ceiling Tiles Faux Tin Ceiling Tin Ceiling Tiles

Gypsum Board False Ceiling With Stained Glass Panels A Comprehensive Guide To Installing Stained False Ceiling Design Pop False Ceiling Design Ceiling Design
Https Encrypted Tbn0 Gstatic Com Images Q Tbn 3aand9gcsicl3 4elnyrd Zjhbnjfxtphfiehqtleexcq31yrujmunm7l7 Usqp Cau

Pin By Mike Liang On Irregular Ceiling Tile Shape And Pvc Ceilings Ceiling Tile Type Artistic Ceiling Pvc Wall Panels Pvc Ceiling Plastic Ceiling Panels

Maple Clear Finish Ceiling Lights Pvc Ceiling Design Wood Ceilings

Pvc Flexible Plastic Sheet Decorative Wall Panels And Interior Pvc Ceiling View Pvc Flexible Plastic Sheet Decorative Wall Panels And Interior Pvc Ceiling Din Decorative Wall Panels Pvc Ceiling Wall Panels

Https Www Palram Com Us Product Ag Tuf Pvc Corrugated Sheets Chemical Resistant Maintenance Free Pv Interior Cladding Cladding Corrugated Sheets

Bathroom Ceiling Panels At Home Depot Best House Design Pvc Ceiling Design Pvc Ceiling Bathroom Ceiling

Rm24 Polystyrene Ceiling Tile Styrofoam Ceiling Tiles Ceiling Tiles Tile Installation
Pvc Ceiling Tiles Ceilings Armstrong Residential

Beadboard Photo 22 Beadboard Porch Ceiling House With Porch

Fromplaintobeautifulinhours Elizabethan 2 Ft X 2 Ft Lay In Or Glue Up Ceiling Tile In Aged Silver Way Pvc Ceiling Tiles Faux Tin Ceiling Tin Ceiling Tiles

Pvc Ceiling Cladding Installation Pvc Ceiling Cladding Ceiling Cladding Pvc Ceiling

Availability Delivered Within 3 14 Business Days Size 23 75 X 23 75 Thickness 0 50 Mm Style Co Tin Ceiling Pvc Ceiling Tiles Faux Tin Ceiling Tiles

Pin Di Alero

6 White V Groove Ceiling Panels Pvc Plastic Wall Ceiling Bathroom Cladding Cladding Wallpaper Pvc Ceiling Panels Cladding Panels

Talissadecor 3d Leather Panel Is Beautifully Made Product When Panels Installed They Create Large Leather Wall Panels Faux Leather Walls Accent Wall Designs

3 X 20 4 Ribcore Pvc Corrugated Panel Pvc Ceiling Panels Pvc Ceiling Paneling

Faux Tin Ceiling Tile 24 X 24 222 Designer Ceiling Tiles Tin Ceiling Tin Ceiling Tiles Faux Tin Ceiling Tiles

Complete Drywall Installation Guide Part 2 Installing Drywall On Your Ceiling Youtube Drywall Installation Drywall Installation

Stained Plank Ceiling Pictures Philippines Plank Ceiling Pvc Ceiling Design Ceiling Design

Decorative Ceiling Tiles Basement Ceiling Proceilingtiles Copper Ceiling Faux Tin Ceiling Metal Ceiling Tiles

Stained Glass Panels With Printed Decorations And Ceiling Led Lights A Comprehensive Gui Ceiling Design Modern False Ceiling Design Ceiling Design Living Room

Cathedral Ceiling Tile By Udecor Gives This Room Character And Warmth This Pvc Ceiling Tile Looks Just Lik Faux Tin Ceiling Tin Ceiling Faux Tin Ceiling Tiles

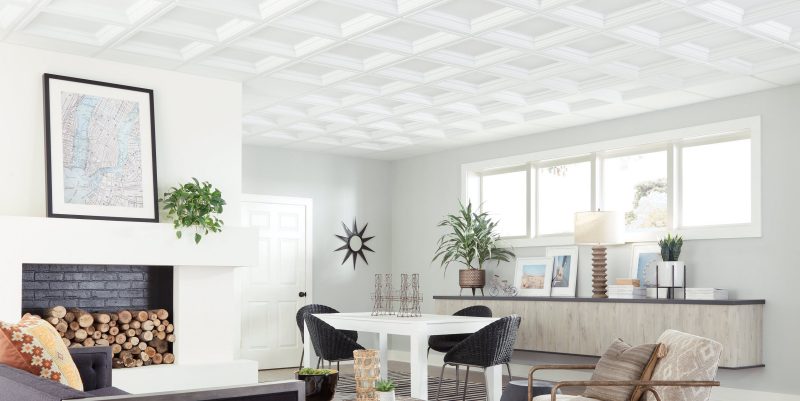
Icon Coffer 2 Ft X 2 Ft Pvc Drop In Ceiling Tile In White In 2020 Ceiling Tiles 2x2 Ceiling Tiles Pvc Ceiling Tiles

Welcome To My Store We Supply All Kind Of Faux Painting Ceiling Tiles Faux Tin Ceiling Tiles Material Is In 2020 Faux Tin Ceiling Tiles Tin Ceiling Faux Tin Ceiling

